


Remove or Uninstall Programs from Mac OS X
I love my MacBook Pro running OS X Lion and I even use it as my primary machine nowadays. I find it more intuitive than Windows in terms of using the display space efficiently and how smoothly you can move through applications. That being said, there is one thing that has always bothered me and still does. Uninstalling programs!
Why is it that Apple cannot come up with a simple standard way for users to uninstall programs. This is not Linux, it should be a piece a cake! Unfortunately, removing applications from a Mac, especially older programs, is a royal pain. Most websites tell you to buy a third-party program that will properly remove all the files from your system! Why the heck should I have to buy a program to do something so simple on such an advanced operating system?
Anyway, in this post I’ll try to walk you through the various methods you can use to properly uninstall a program from your Mac. There are basically two ways a program gets installed on the Mac. Some of the newer programs come as bundles or packages, which means that all of the files are stored in one folder. This is nice because you can simply trash that one folder in order to get rid of 99% of the files.
However, if it’s not a package, then the program gets installed in several locations and unless the program came with an uninstaller script, you will have to manually remove all the files. What fun!
So first things first, you should figure out whether the program is a package/bundle or not. You can do this by going to Finder, then Applications and right-clicking on the program you want to uninstall.

If you see an option in the content menu called “Show Package Contents”, that means the program is a bundle and you can simply take the application from the Applications folder and dump it into the trash. That takes care of just about all of the application, except for a few minor files.
There are two other locations where other leftover files could be. Both of these locations are in the Library folder on your Mac. You cannot see this folder by default in Mac OS X Lion, so you have to go to the Terminal and type in the following command to make it visible.
chflags nohidden ~/Library/

Now when you go to your root folder in OS X, you will see the Library folder in the list:

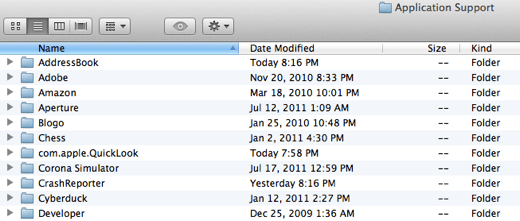
In that folder are two folders that can possibly hold extra files associated with a program: Application Support and Preferences. The files in Preferences are very small and don’t take up much space, but the Application Support files could be fairly large, so it’s good to remove those files also.
Delete the appropriate folders here and you should be good to go. This is pretty good for most people, but if you really are hardcore and want to make sure you got every last file, you have to use the full power of Finder. Open Finder and search for the app you want to delete, such as Skype. Before you press Enter, however, you’ll see a drop down menu and here you want to choose Filename contains “skype”. If you don’t do this, it will search the content of files for the word Skype.

Next click the This Mac button instead of All My Files. This will search your entire Mac instead of just a few folders.

Next go to list view instead of the icon view so that you can sort the files easier. It’s the one right about the “This Mac” button that looks like 4 horizontal lines. Now you won’t see many files at this point because by default, Finder does not search system files. You can include them by clicking the + icon at the far right, next to the Save button.

A new menu bar will appear where you will see Kind is Any. Click on Kind to see a drop down. If you don’t see System Files in the list that comes up, click on Other and then you’ll see a huge list. Scroll down until you see System Files and select it. Also, go ahead and click the check box so that it is included in the menu for later use.

Now go ahead and change Aren’t Included to Are Included in the second drop down box.

Whew! Now you should see all the files and folders with Skype in the name. Go ahead and click on the Kind to sort the files.

You can also click on View and choose Show Path Bar so that you can see the path to any of the files and folders.

Using this manual method, you can pretty much rest assured that you have not missed any file associated with a program. Remember, there is no registry in OS X like in Windows, so you don’t have to go deleting stuff out of a database or anything else. It’s all stored in folders and files. If you have any issues with uninstalling apps from your Mac, post a comment here and I’ll try to help. Enjoy!